This guide will walk you through the process of adding Portainer-ce to your Synology NAS and setting up connectivity to manage your existing Synology containers.
This was validated working on DSM 7.2.2-72806 Update 3
Model: DS723+
STEP 1
Install Container Manager via Synology “Package Center”. If you run an older DSM version (under 7.2), search for Docker instead of Container Manager.

STEP 2
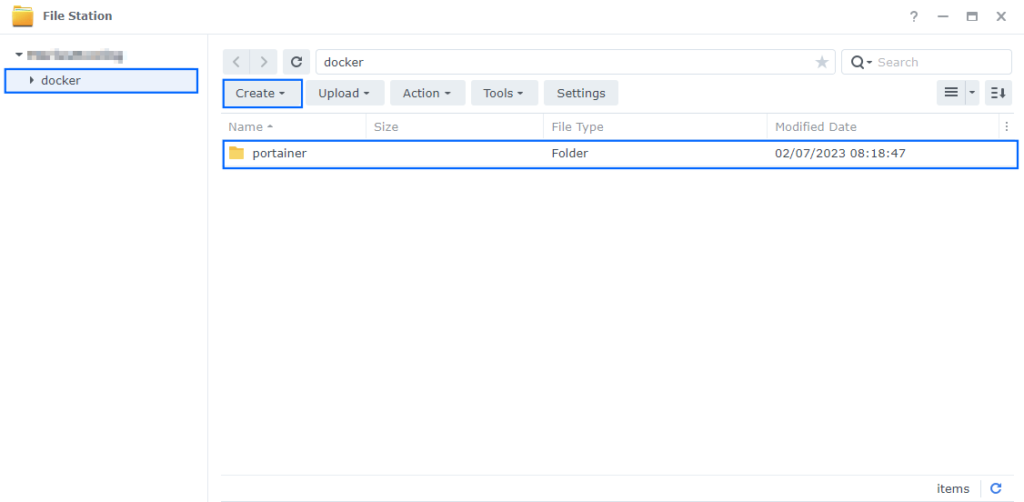
Go to File Station and open the docker folder. Inside the docker folder, create a new folder and name it portainer. Follow the instructions in the image below.
Note: Be careful to use only lowercase, not uppercase letters.
STEP 3
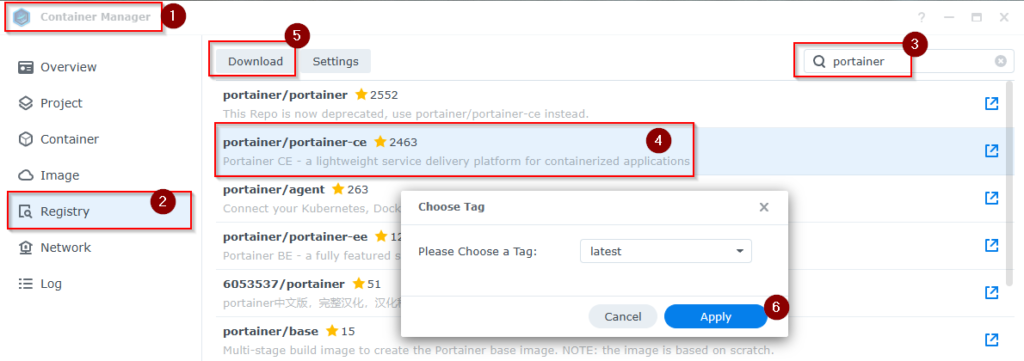
Go to the Container Manager and open the Registry tab. Search for portainer in the top right. The version you’re looking for is portainer-ce. Select the proper version and click Download. I default to the latest version and click apply.
STEP 4
Go to the Container Manager and open the Project tab. Click on the Create button to create a new project. Define the path of the portainer folder previously created (don’t just blindly follow my screenshots). You’ll paste the Docker Compose yaml configuration here in the next step.

STEP 5
Update the below docker compose.yaml to accomodate our needs. For me, I had conflicts with some of my ports, so I re-mapped them. Also make sure you define the volume path for your portainer data.
version: '3'
services:
system.portainer:
image: portainer/portainer-ce:latest
container_name: system.portainer
hostname: portainer
restart: unless-stopped
mem_limit: 128m
mem_reservation: 48m
cpu_shares: 128
ports:
- "1000:8000" #CHANGE_IF_CONFLICT
- "2000:9000" #CHANGE_IF_CONFLICT
- "9443:9443" #CHANGE_IF_CONFLICT
security_opt:
- no-new-privileges:true
environment:
- PUID=1234 #CHANGE_TO_YOUR_UID
- PGID=6754 #CHANGE_TO_YOUR_GID
volumes:
- /etc/localtime:/etc/localtime:ro
- /var/run/docker.sock:/var/run/docker.sock
- /volume2/docker1/portainer:/data #CHANGE_TO_YOUR_PATH
logging:
driver: json-file
options:
max-file: "3"
max-size: "10m"
STEP 6
Open your browser and type in http://Synology-ip-address:9000 Follow the instructions in the image below. Choose a Username and a strong Password, confirm the password, then press Create user.

STEP 7
Click Get Started (proceed using the local environment in which Portainer is running). Follow the instructions in the image below.

STEP 8
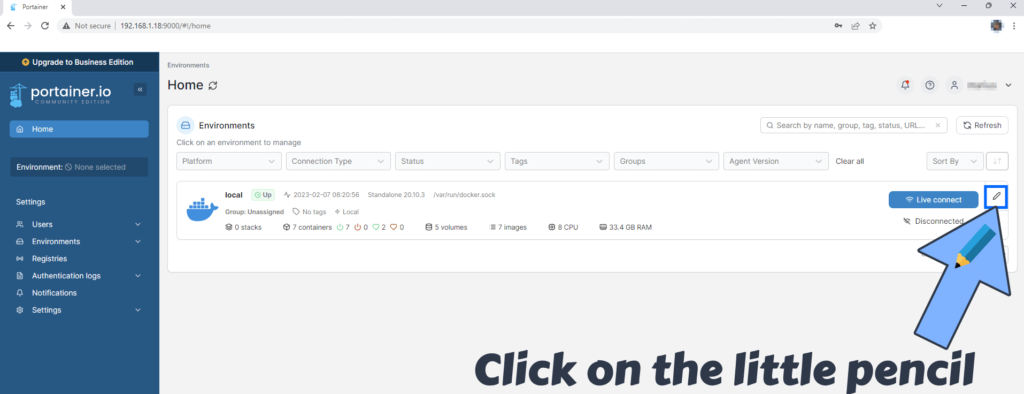
On the right in the Environments are, click on the little pencil. Follow the instructions in the image below.
STEP 9
After you click on the little pencil a new page will open. On the Public IP area type in your own NAS Local IP which, in this example’s case, is 192.168.1.18 then click Update environment. Follow the instructions in the image below. If everything goes right, you will see this message at the top right of your screen: “Environment updated“.

STEP 10
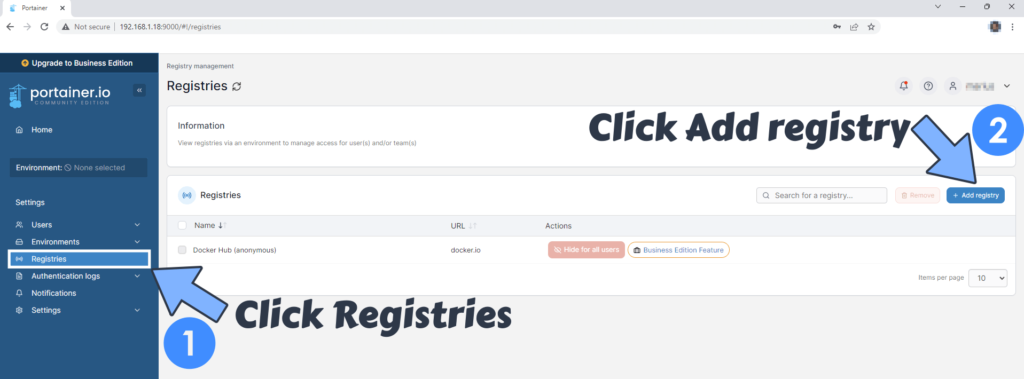
On the left Portainer sidebar, click on Registries then Click + Add registry. Follow the instructions in the image below.
STEP 12
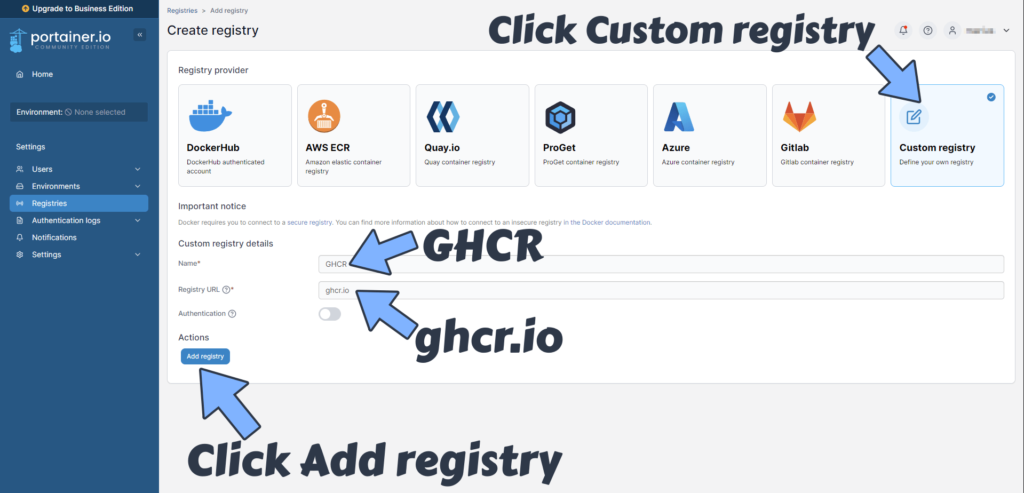
Click on Custom registry. In the Name field area type in GHCR and in the Registry URL area type in ghcr.io
Click Add registry to save the settings. Follow the instructions in the image below.
Note: The ghcr.io registry is mandatory if you want to update Docker containers via Portainer that are served via ghcr.io registry.
STEP 13
Click on Custom registry. In the Name field area type in CODEBERG and in the Registry URL area type in codeberg.org
Click Add registry to save the settings. Follow the instructions in the image below.
Note: The codeberg.org registry is mandatory if you want to update Docker containers via Portainer that are served via codeberg.org registry.

STEP 14
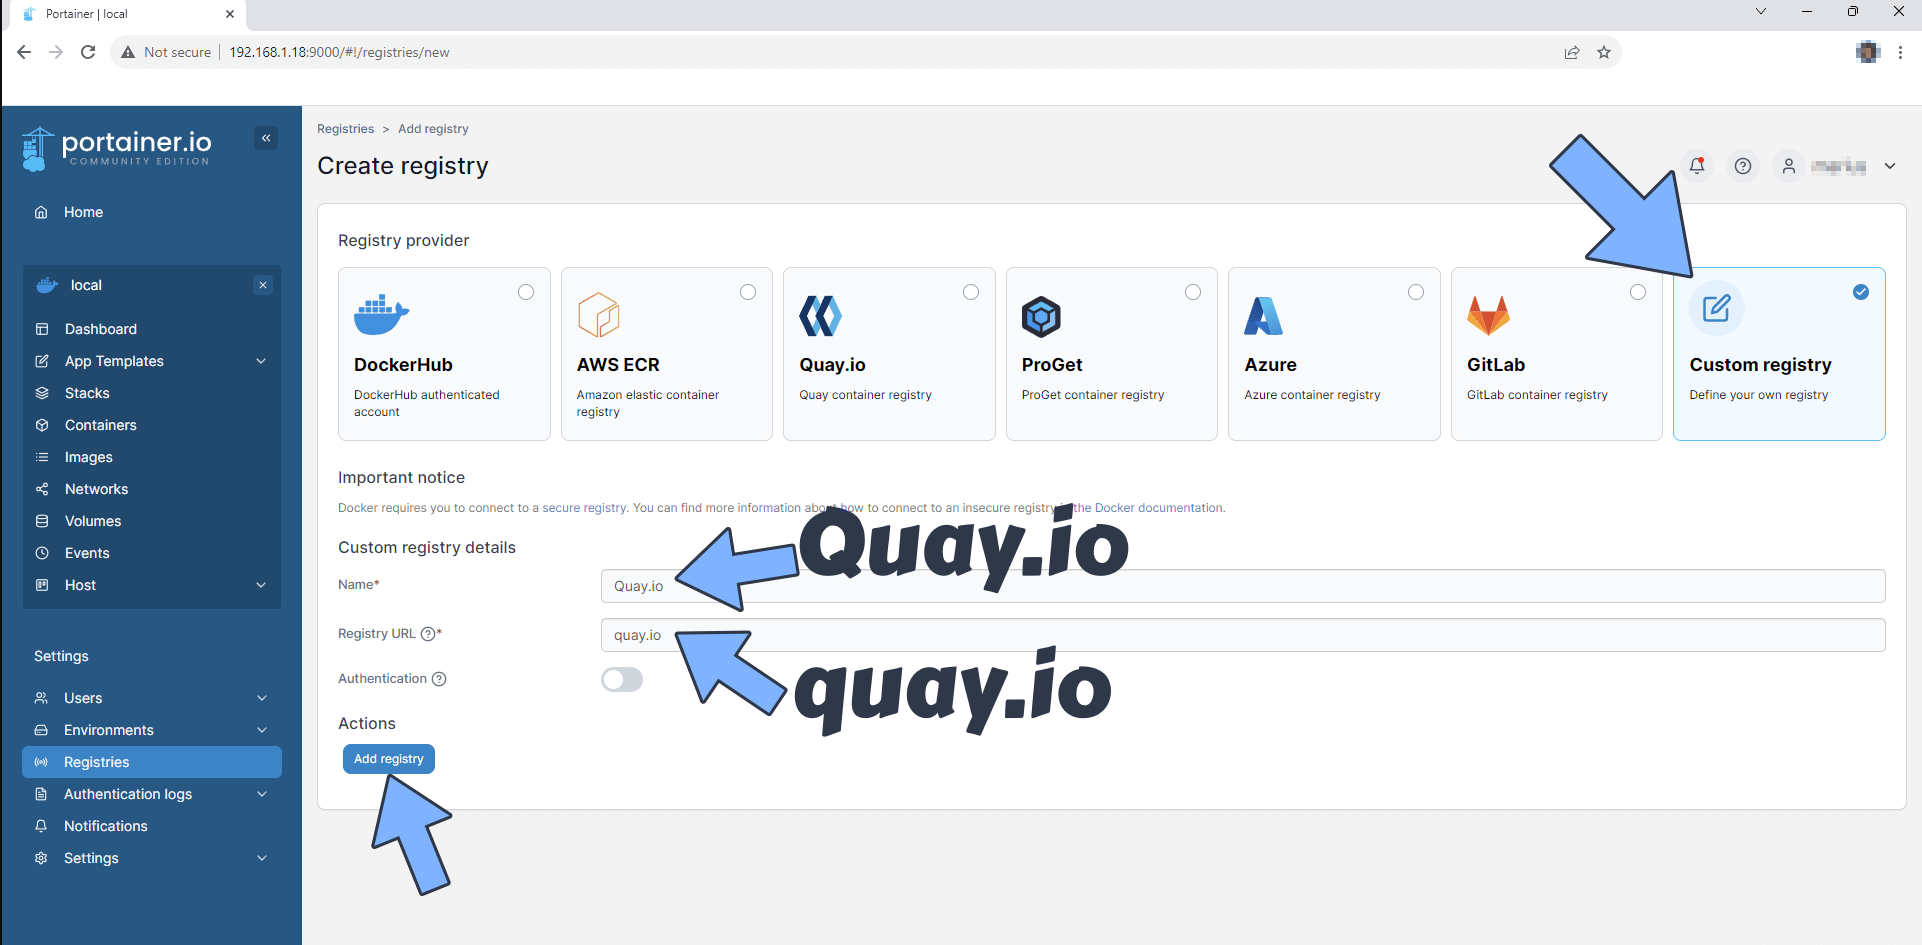
Click on Custom registry. In the Name field area type in Quay.io and in the Registry URL area type in quay.io
Click Add registry to save the settings. Follow the instructions in the image below.
Note: The quay.io registry is mandatory if you want to update Docker containers via Portainer that are served via quay.io registry.
STEP 15
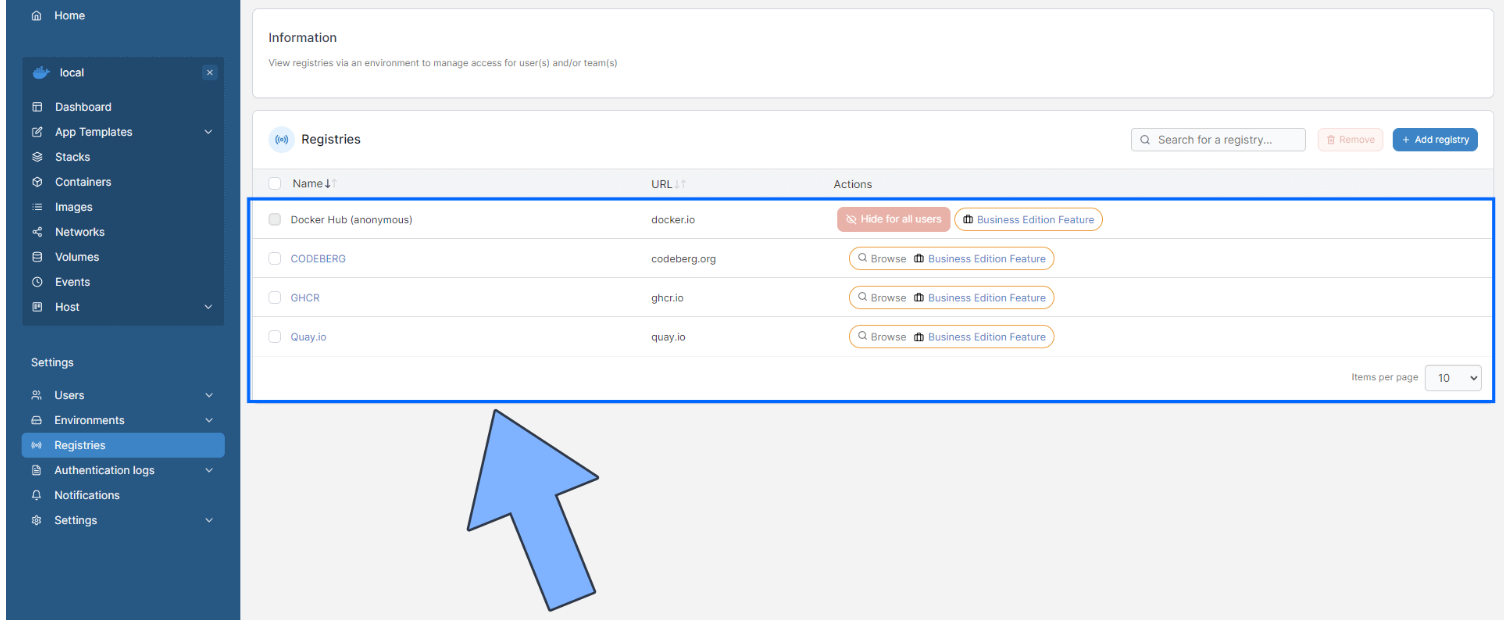
Verify that everything went well and the registries are properly showing up. You should see something like this under Registries:
– moo –

- Setting up Portainer on Synology NAS via Compose - February 28, 2025
- ERP Logistics Integration - October 22, 2024
- Mobile Device Management Consulting Services - September 22, 2024